Securing your Azure Functions with Microsoft Azure AD (EasyAuth)
For one of our projects we had to secure the Azure Functions (AF) with Microsoft Azure Active Directory (AAD). Searching the web revealed a lot of partial solutions, but no complete overview. In this post, I will try to give that overview.
The easiest way to get the job done
In the Azure portal, go to the Function App you want to secure, select the tab ‘Platform features’ and choose ‘Authentication/ Authorization’ under Networking. This will take you to a screen where you can turn App Service Authentication on. So far, so good. You get the question what should happen when the user is not authenticated. Do you have functions in the Function App everyone should be able to reach? In that case select ‘Allowed Anonymous requests (no action)’. This implies that you should handle the authentication validation yourself in the functions. Otherwise select ‘Log in with Azure Active Directory’. This will block users. Click on the line ‘Azure Active Directory – Not Configured’ to configure the provider. Select the Management mode ‘Express’ and ‘Create New AD App’. This will do all configuration in the Azure Function and AAD for you.
But what did just happen here?
Express Mode is nice, but all control is gone. When saving the Function App settings, a new Application is registered in the Azure AD, a client secret is generated and together with the Client Id and Tenant Id configured in the Function App. Authentication is enabled with a redirect to ‘https://yoursite.azurewebsites.net/.auth/login/aad/callback, allowing an Implicit Grant with ID tokens. The API permission User.Read is granted to the application. And a scope is added for user_impersonation.
Doing it the harder way
If you want to have more control, go to the Azure Active Directory and register a new Application. Give it a name and determine where the accounts are coming from. After pressing register, you will see the overview screen. Here are details you need later (client-id and tenant-id).
Authentication
The next step is defining the redirect-uri for the Azure Function. This is where the function will retrieve the authentication details. The uri is the url of the function app + /.auth/login/aad/callback. Under implicit grant, tick ID tokens.
Certificates and secrets
You will now need to generate a client-secret. It is optional when configuring the Azure Function, but crucial if you want to test the function using postman. Do not forget to copy the secret before leaving this page.
Expose an api
The next step is registering a scope. When you don’t, you could end up with an invalid audience in the jwt-token. Click Add a scope. This will prompt you for an Application ID URI. The default should be just fine, but you can change it if you like. Now you can add a scope. Give it a name and description, allow users and admins and fill in the rest of the details.
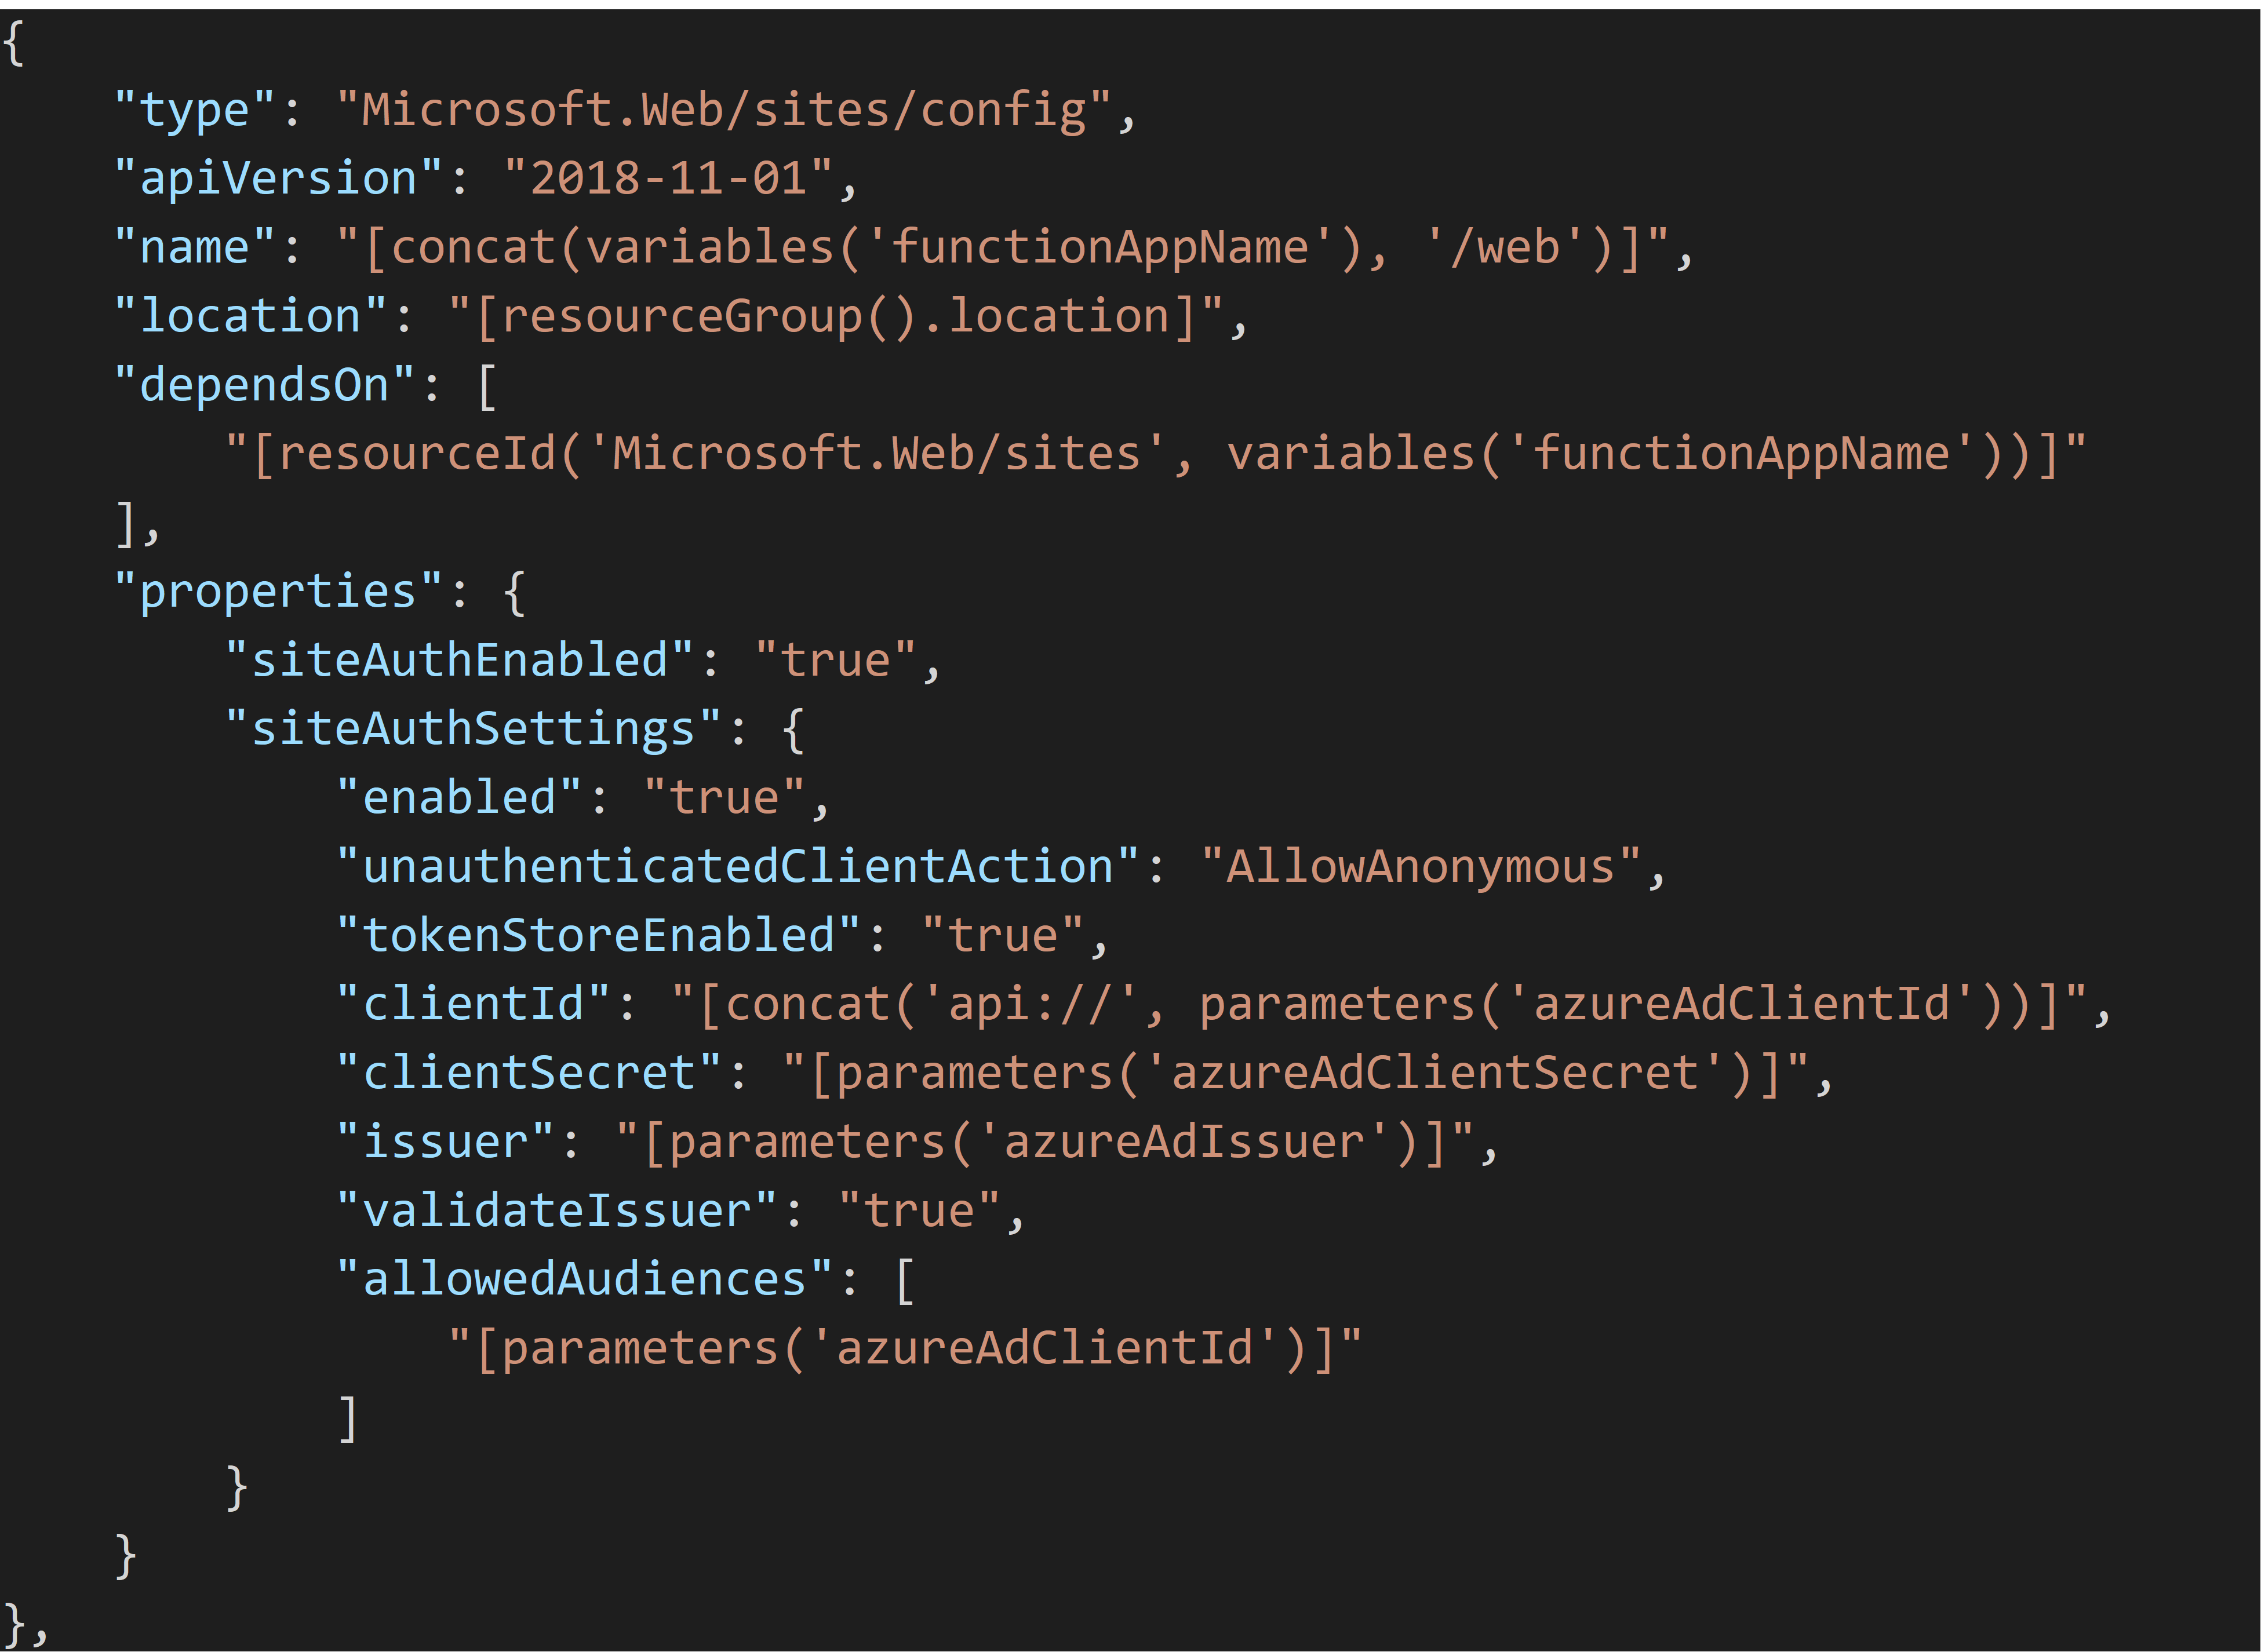
Configure using ARM templates
This is something you want to automate in your deployment pipelines. ARM templates come in handy there. The templates generated from Azure are of no help at all. For more details about these settings in the ARM template, refer to https://docs.microsoft.com/en-us/azure/templates/microsoft.web/2018-11-01/sites/config-authsettings.
How to get the user details
You are probably not just securing your function; you also want to make use of the credentials in your function. This part is easy, all the heavy lifting is done by Azure AD. Just add the ClaimsPrincipal-parameter to the function entrypoint and you will be able to use the credential details of the user.
Take care
When you selected ‘Allow anonymous requests’ before, you should validate the credentials you receive in your function. Except of course when the function should be public. When you configured the function with ‘admin’ or ‘function’ as authentication level, the claim will contain at least two keys for the authentication level. Just checking if you receive claims is not enough.
Useful links
- https://jwt.io: here you can evaluate the received jwt token.
- https://jwt.ms: the Microsoft version of jwt.io. It also shows details of the claim.
- https://docs.microsoft.com/en-us/azure/active-directory/develop/v1-protocols-oauth-code: a good resource for understanding the authentication code flow used when signing in to Azure AD.
- https://docs.microsoft.com/en-us/azure/templates/microsoft.web/2018-11-01/sites/config-authsettings: the location to get more details on ARM-templates.
- https://docs.microsoft.com/en-us/azure/app-service/configure-authentication-provider-aad: more elaboration on the steps to configure Azure AD. Also describes the need for Application ID URI.