Gradle: behind the basics
If you know the basics of Gradle but want to have a better understanding of how it works and what else is possible keep on reading. In this post I will talk about:
- The Gradle build lifecycle
- Gradle plugins
- Use of properties
- Kotlin as DSL
Up until recently I only used Gradle when I needed to add a dependency or some basic plugin. I never really took the time to dig deeper into Gradle. I knew that Gradle had way more to offer than what I was using and recently I had some spare time and decided that this was the moment for me to go past the basics. I took a course on Gradle (https://www.udemy.com/course/gradle-masterclass/) and did some practicing and this blog post is the result of the most important bits that I’ve learned.
The Gradle build lifecycle
Build phases
A Gradle build has three distinct phases.
- Initialization
- Gradle supports single and multi-project builds. During the initialization phase, Gradle determines which projects are going to take part in the build, and creates a Project instance for each of these projects.
- Configuration
- During this phase the project objects are configured. The build scripts of all projects which are part of the build are executed.
- Execution
- Gradle determines the subset of the tasks, created and configured during the configuration phase, to be executed. The subset is determined by the task name arguments passed to the
gradlecommand and the current directory. Gradle then executes each of the selected tasks.
source: https://docs.gradle.org/current/userguide/build_lifecycle.html
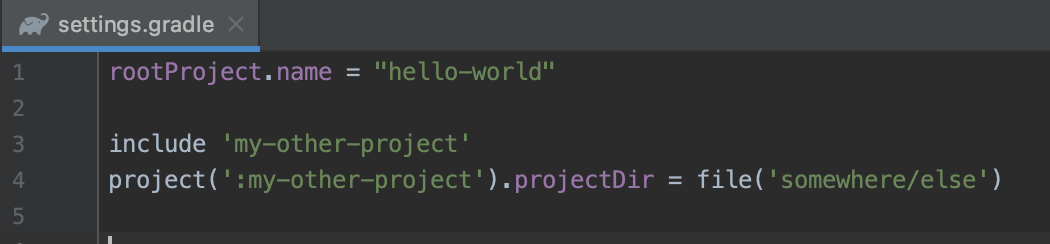
As explained above the Initialization phase is responsible for determining what projects are going to be used. This is exactly where the settings.gradle file is for, telling Gradle what different projects/modules there are.
Besides the settings.gradle file there’s another file that’s part of the Initialization phase: the init scripts or init.gradle file.
The init.gradle file (https://docs.gradle.org/current/userguide/init_scripts.html) allows you to define logic before the Gradle build has actually started. This allows you to for example change the way Gradle logs or add a mandatory company provided repository for dependencies.
One of the strange things about the init script is that the location of this file is inside of the .gradle folder which is excluded from git. An alternative would be to provide the script as an argument to Gradle using –init-script init.gradle. However that is bound to go wrong at some point.
The most common approach that I’ve seen is creating a custom distribution of Gradle with the init script included. This feels finicky for something that seems a bit of a niche. But apparently, people have had a proper use case for this for example: https://blog.mrhaki.com/2012/10/gradle-goodness-distribute-custom.html
As for the Configuration and Execution phase, both phases make use of build.gradle files of which there can be multiple as opposed to the settings.gradle file of which there can only be one.
in the Configuration phase Gradle walks through the script to find out what tasks there are. In a way this can be compared to asking people around you at work what their plans are for today, what input they need to get started and who is waiting for their work.
Then in the Execution phase all of the work is executed in the right order starting with the tasks which have no dependencies on others etc.. until all work is done. As you can imagine if 2 tasks are in need of each other albeit directly or through other tasks, a circular dependency occurs. Gradle detects this part in the configuration phase and then refuses to perform the Execution phase.
In order to illustrate what I’ve explained above, I created an example.
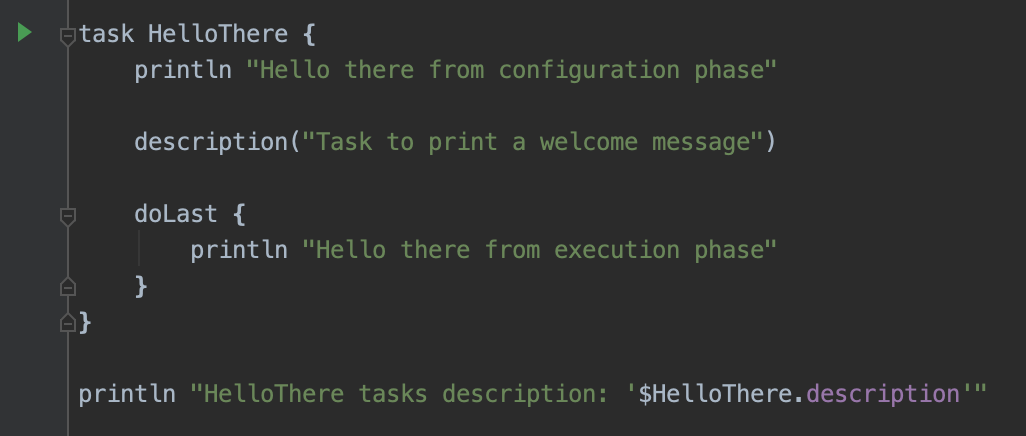
Here I’ve created a Gradle task ‘HelloThere’ which performs some setup on the newly created task such as setting the description and then defines what logic needs to be executed once the ‘HelloThere’ task is executed in the doLast part of the task (more about the doLast part in the next section).
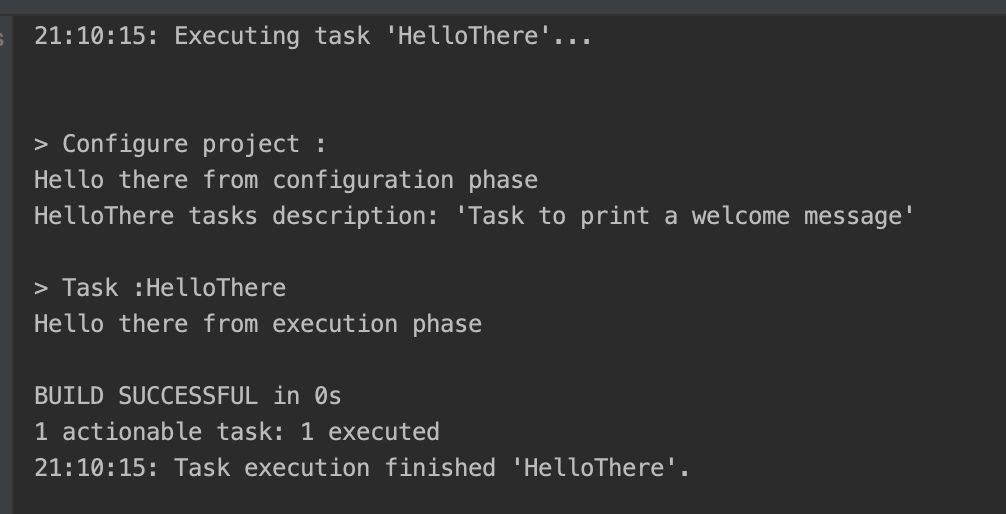
As you see above there is a distinction between what is executed in the configuration phase vs the execution phase. This matters because the code in the configuration phase is executed for every task you execute(!). While the code in the doLast is only executed if you execute the specific task.
Extending the Gradle lifecycle
In the example above I created a new task that I had to explicitly start by executing the command: ./gradlew HelloThere. However, ideally your new task is part of some existing lifecycle and started automatically whenever it is ready to perform its job.
When a task is not dependent on any other task you can make the task part of the ‘defaultTasks’ method.
However most of the time your task is dependent on some other task. In this situation, a better approach would be to make your new task directly depent on the other task.
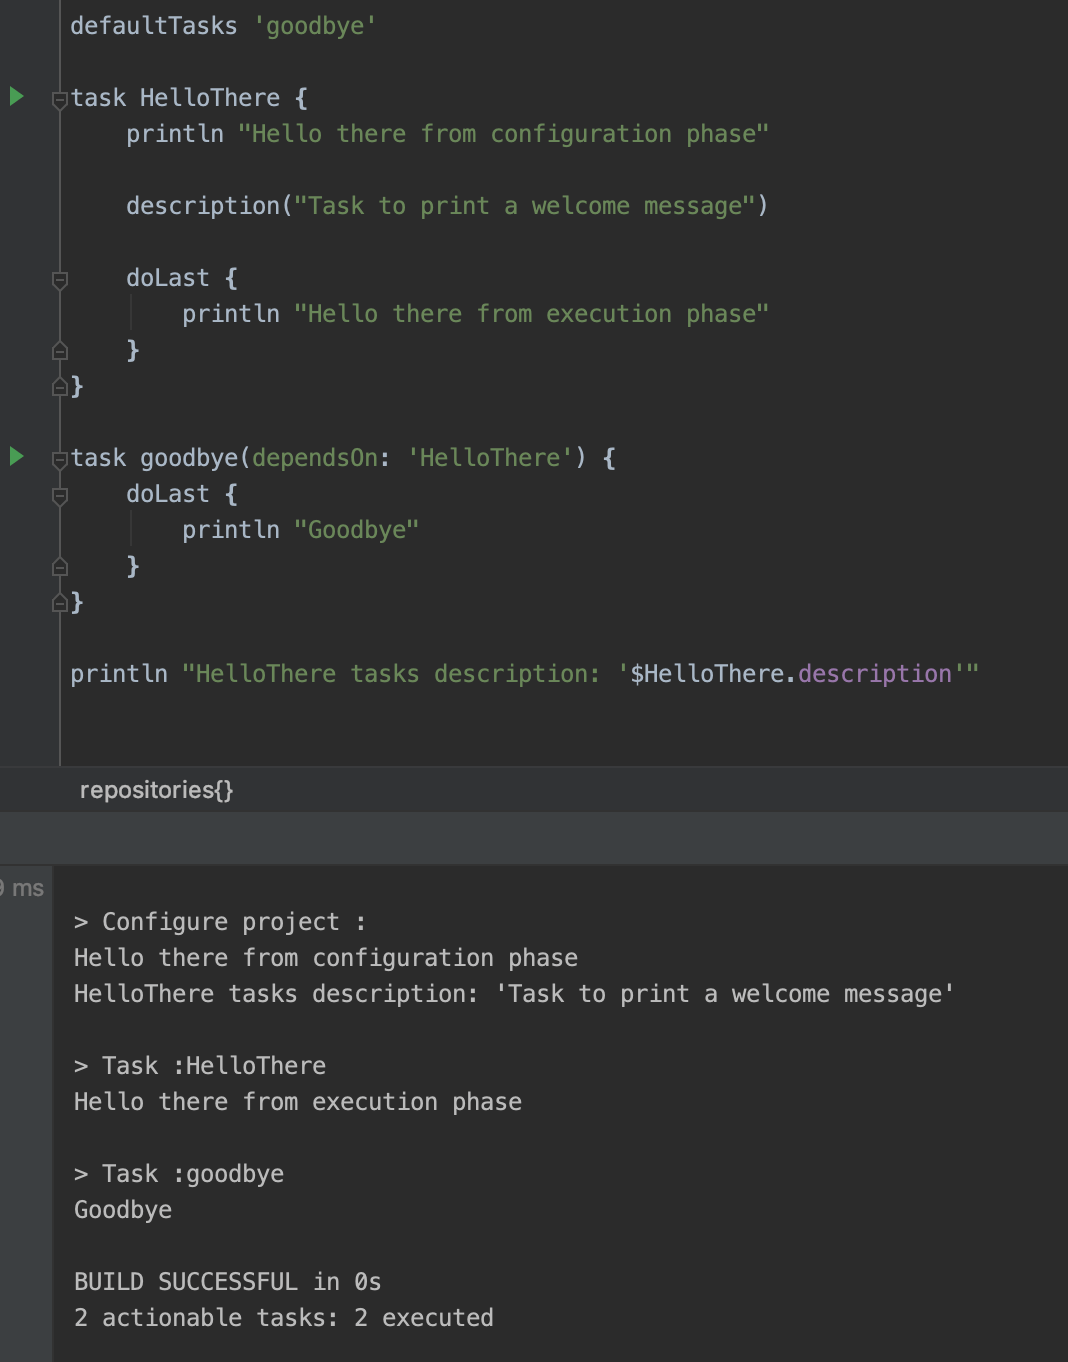
Here you can see an example where I’ve introduced a new task ‘goodbye’ which is the defaultTask which means we can start this task by simply executing ./gradlew. However the ‘goodbye’ task first needs the ‘HelloThere’ task the be executed.
Plugins
Plugins are basically nothing more than a set of tasks that hook into the existing Gradle tasks (using the same dependsOn logic as above) and/or provide standalone tasks. The java plugin for example (https://docs.gradle.org/current/userguide/java_plugin.html) extends the existing Gradle tasks with logic to compile java code, run tests, build a jar etc..
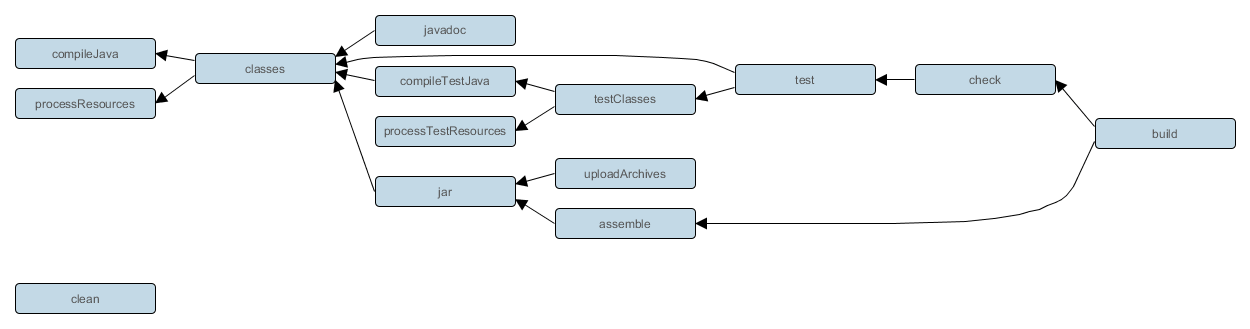
In the image above you can see what tasks the java plugins adds and their interdependency on each other
Noteworthy plugins
Besides mandatory plugins to run your project like the Java plugin, there are also utility plugins that help make a developers life easier.
An example of this is the scan plugin built by Gradle itself (https://docs.gradle.com/enterprise/gradle-plugin/). It adds the option to scan your Gradle build process for all sorts of metadata such as how long tests took to run but also suggestions about how to improve the speed of you build and way more.
Now that it is clear that plugins are nothing more than a bundle of new tasks or an extension of existing tasks it’s easy to create your own. I won’t go into the details here but if you want to dive deeper check out https://docs.gradle.org/current/userguide/custom_plugins.html.
The use of properties
Every build script has some sensitive information that you don’t want to share. Think of for example credentials for your repository manager, Git or if you’re working with Android, the play store.
Ideally you automate your entire build process so you don’t have to type in passwords manually or define them hardcoded in your project ever. But at the same time you don’t want to check your sensitive passwords into Git as part of your buildscript or code.
This is where the gradle.properties file comes into play. In this file you can define properties in a key=value manner and their contents can be used in your build.gradle and settings.gradle file. You can either create a gradle.properties file in the root of your project (by default part of your versioning system) or in your $GRADLE_USER_HOME. The advantage to the latter is that you credentials which you use over different projects in a single location.
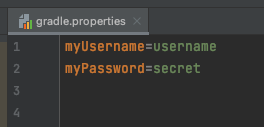
example gradle.properties file

Here’s an example of how to use a Gradle property combined with the hasProperty() function. The hasProperty() does what the name implies checks if the property is there and is useful to find out why something isn’t working.
Kotlin as DSL
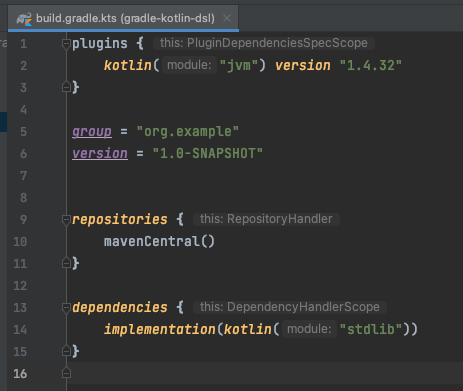
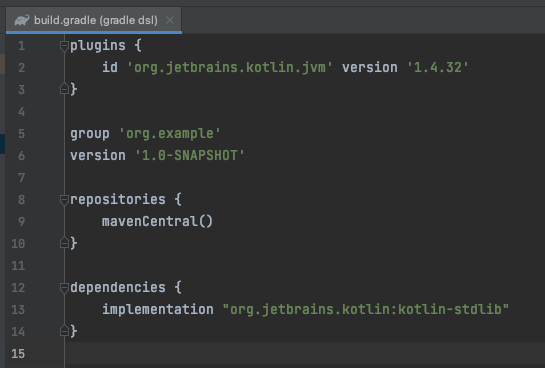
Instead of Groovy which can take some time to get used to you can also use Kotlin (https://docs.gradle.org/current/userguide/kotlin_dsl.html)! What’s better than using the same language for your project and build scripts. Besides, Kotlin is statically typed whereas Groovy is not making it easier to create build scripts!
One other advantage is that Intellij offers better support through things like autocomplete and fancy colors. Below you can see a side-by-side comparison of the two.
Closing thoughts
Learning something is always fun I had fun in this process of doing so. As for how to keep up-to-date with Gradle in the future and continue learning I’ve found the official documentation (https://docs.gradle.org/current/userguide/userguide.html) really useful. It’s clear explicit and has lot’s of examples and if you really don’t know you can always try stackoverflow 😉
Thanks for reading, I hope I’ve helped you gain some new insights into Gradle and its possibilities!