AWS Multi-Account GitOps Deployment 1: Organizational Setup
In the world of AWS, scaling your infrastructure often means the need for multiple AWS accounts to segregate resources, manage access and centralize billing. But how do you organize these accounts efficiently? Let’s set up an AWS multi-account organizational structure, and leverage the GitOps methodology for deployments within this blog series.
Setting the Stage
In the first installment of this three-part series, we walk through the foundational setup necessary to deploy a multi-account GitOps strategy on the AWS Cloud. Leveraging the AWS Cloud Development Kit (CDK), we create an organizational setup to harness GitOps deployment to the fullest across different AWS accounts.
Prerequisites:
- AWS Account with appropriate permissions, preferably a fresh one.
- AWS CLI v2, AWS CDK, projen and TypeScript.
Step 1: Account Preparation
To roll out our CDK stack for organizational structuring, we start with enabling the IAM Identity Center (an evolution from AWS Single Sign-On). This simplifies access, whether it’s through the command line or console. Given the prevailing trend of centralized user, group, and permission management, IAM Identity Center offers AWS customers a cohesive solution. While it has proprietary user and permission management tools, it also smoothly integrates with popular external solutions, like Microsoft Active Directory. For our tutorial, we’re sticking to the straightforward Identity Center Directory by AWS.
- After logging into your AWS account as the root user (always make sure to enable mfa in the IAM console for the root user), navigate to the IAM Identity Center page for your preferred region. Throughout our series, we’re going with Ireland (eu-west-1).

- On this page, select
EnableandCreate AWS organization. This not only grants access via the AWS access portal, but also establishes an AWS Organization. - Following, I suggest personalizing your AWS Access portal URL and assigning a subdomain within
awsapps. For instance, I’ve set mine to https://lutku.awsapps.com/start. - Now that we have set up the Identity Center Directory and the AWS Organizations, we will create our first user to access the console and the command line. Go to Users within the IAM Identity Center and click
Add user.
- Once you’ve entered the essential user details and chosen your login credentials, navigate to the
Permission setspage andCreate permission set. Here, we’ll create Administrator Access permissions to assign to our user for the management account. Don’t forget to save the credentials necessary to login to the AWS access portal!
- Select the AdministratorAccess policy under the predefined permission set and hit next. Create a name for it and preferably extend the session duration to 12 hours, though this should be met with the policies of your organization, and click next. Review the details and create the permission set.
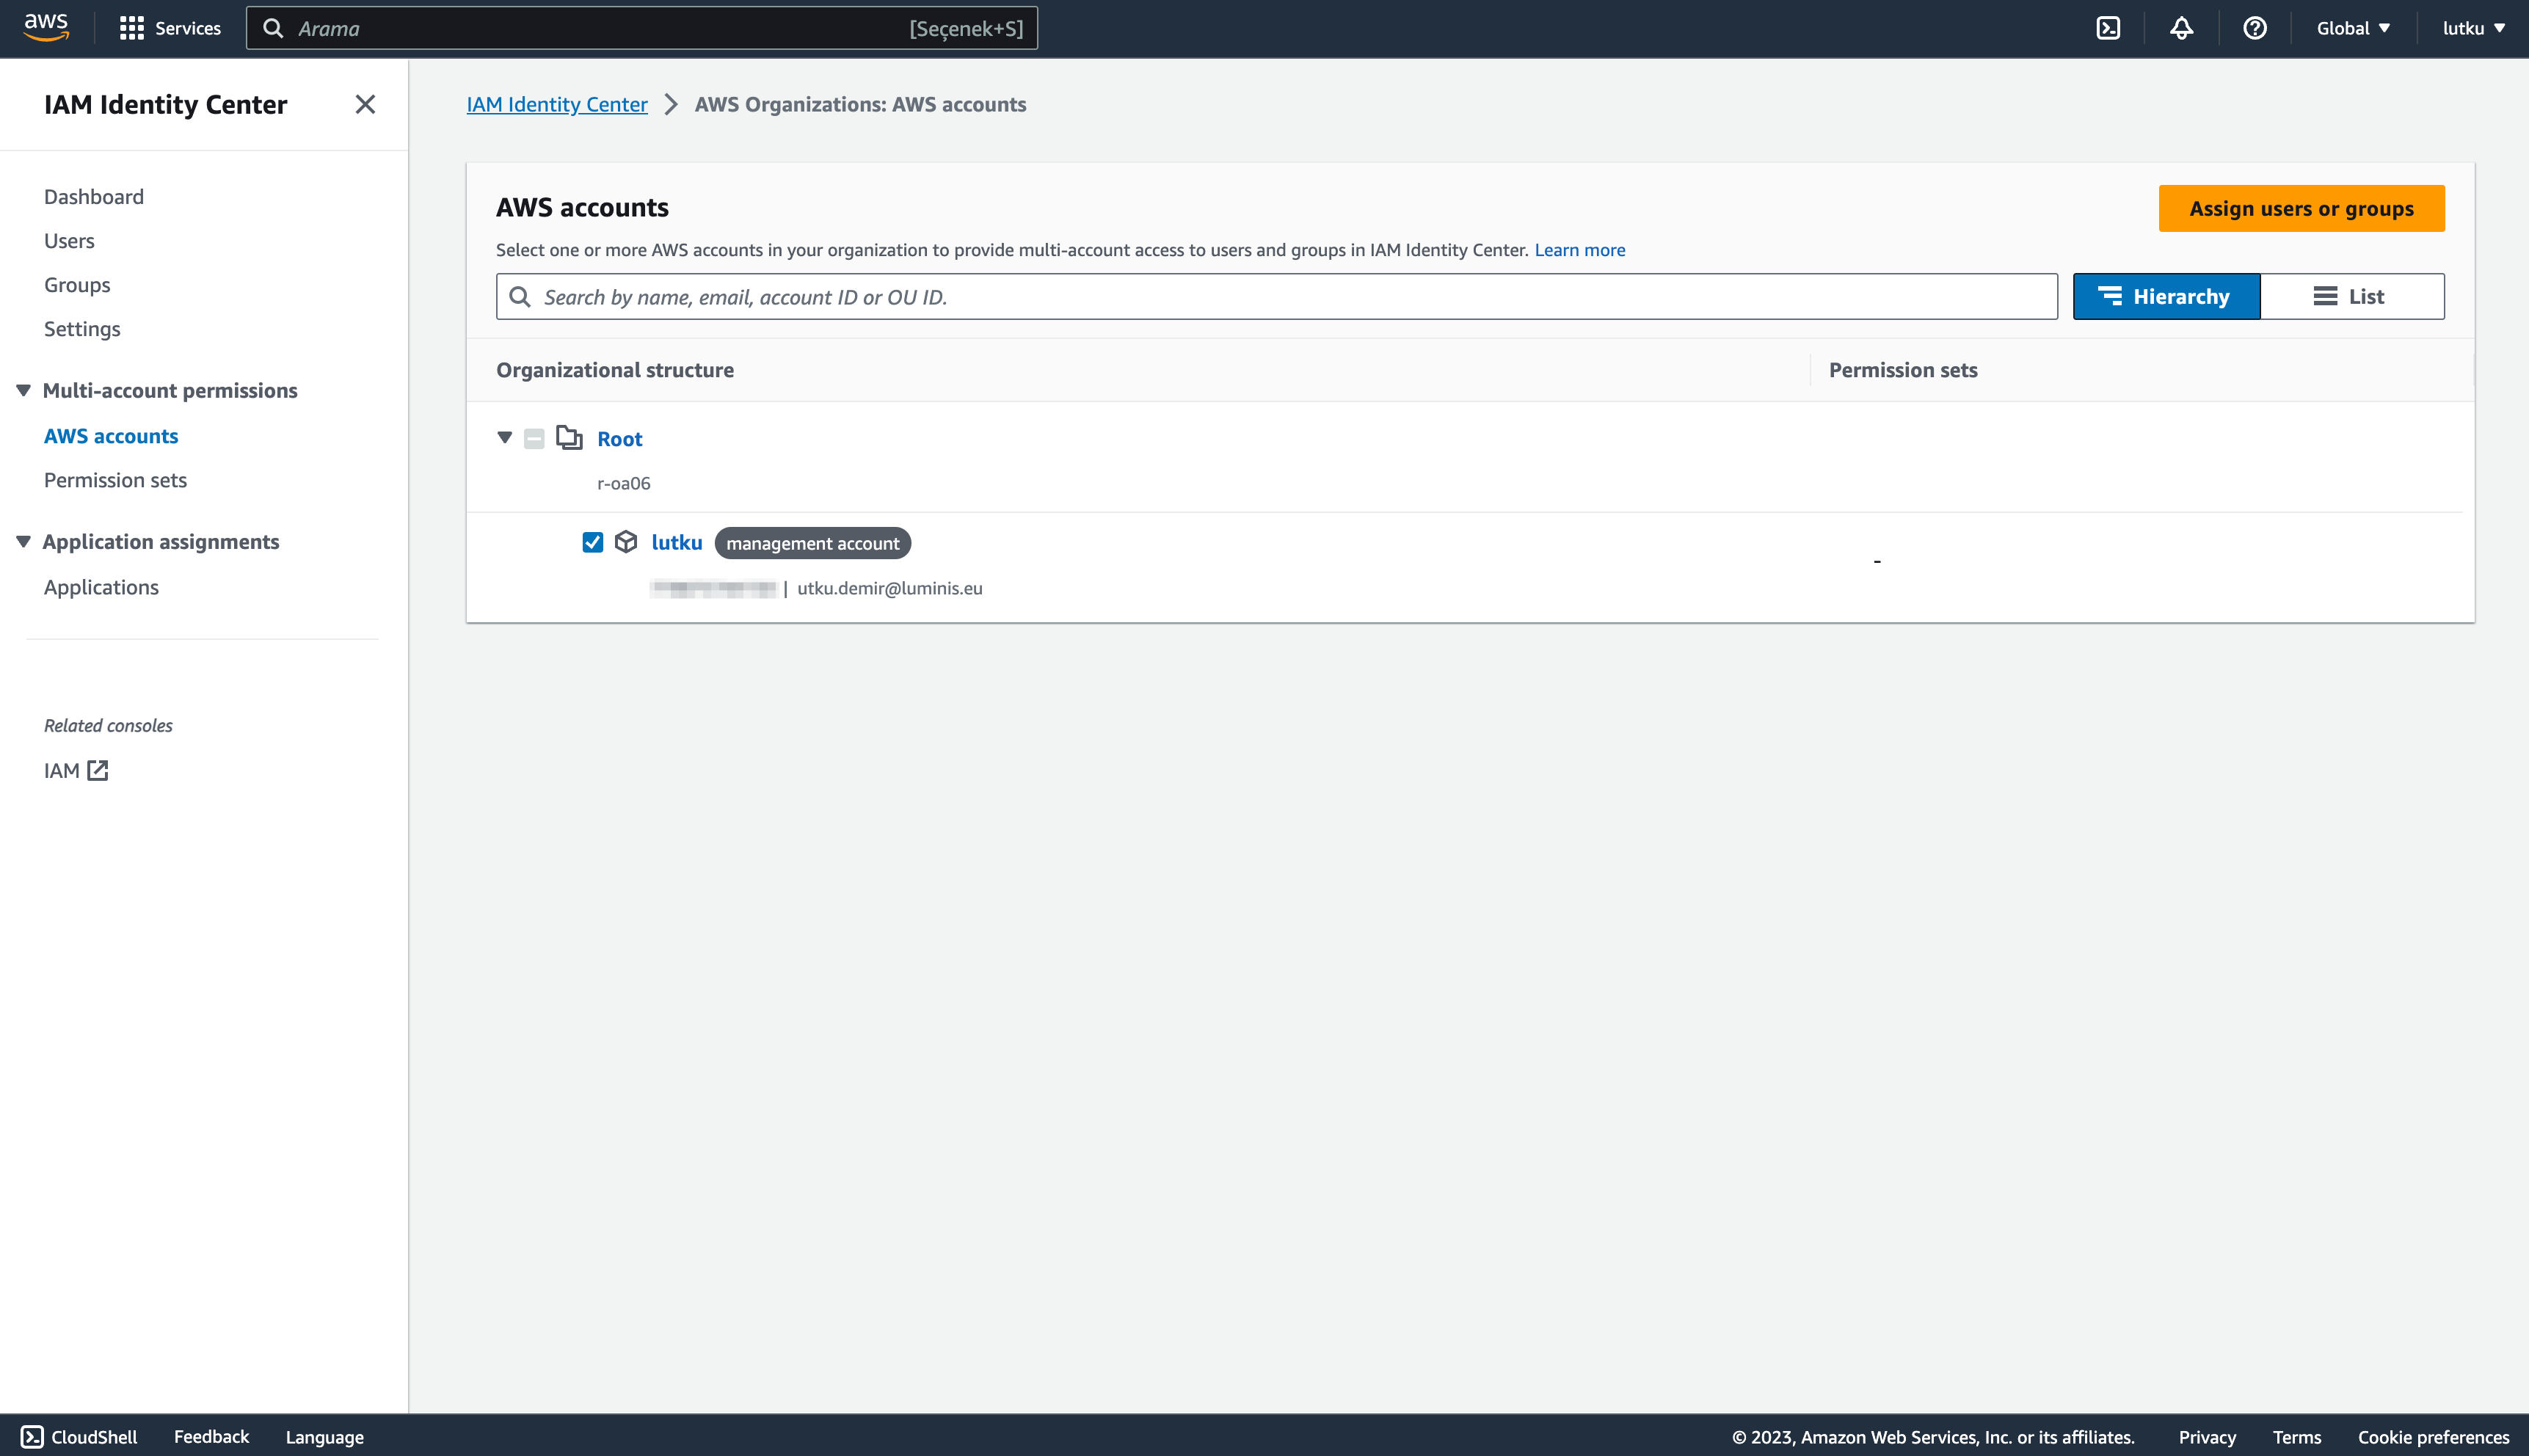
- After creating the user and the permission set, we will assign the permission set for the management account, so that we can access the management account using the AWS access portal. Go to AWS Accounts and hit Assign users or groups after selecting the management account:

- Go to the Users tab and select the user created as in and hit next:

- Select the AdministratorAccess permission set created, and click next. After reviewing, submit the request and assign the permission set to the user.
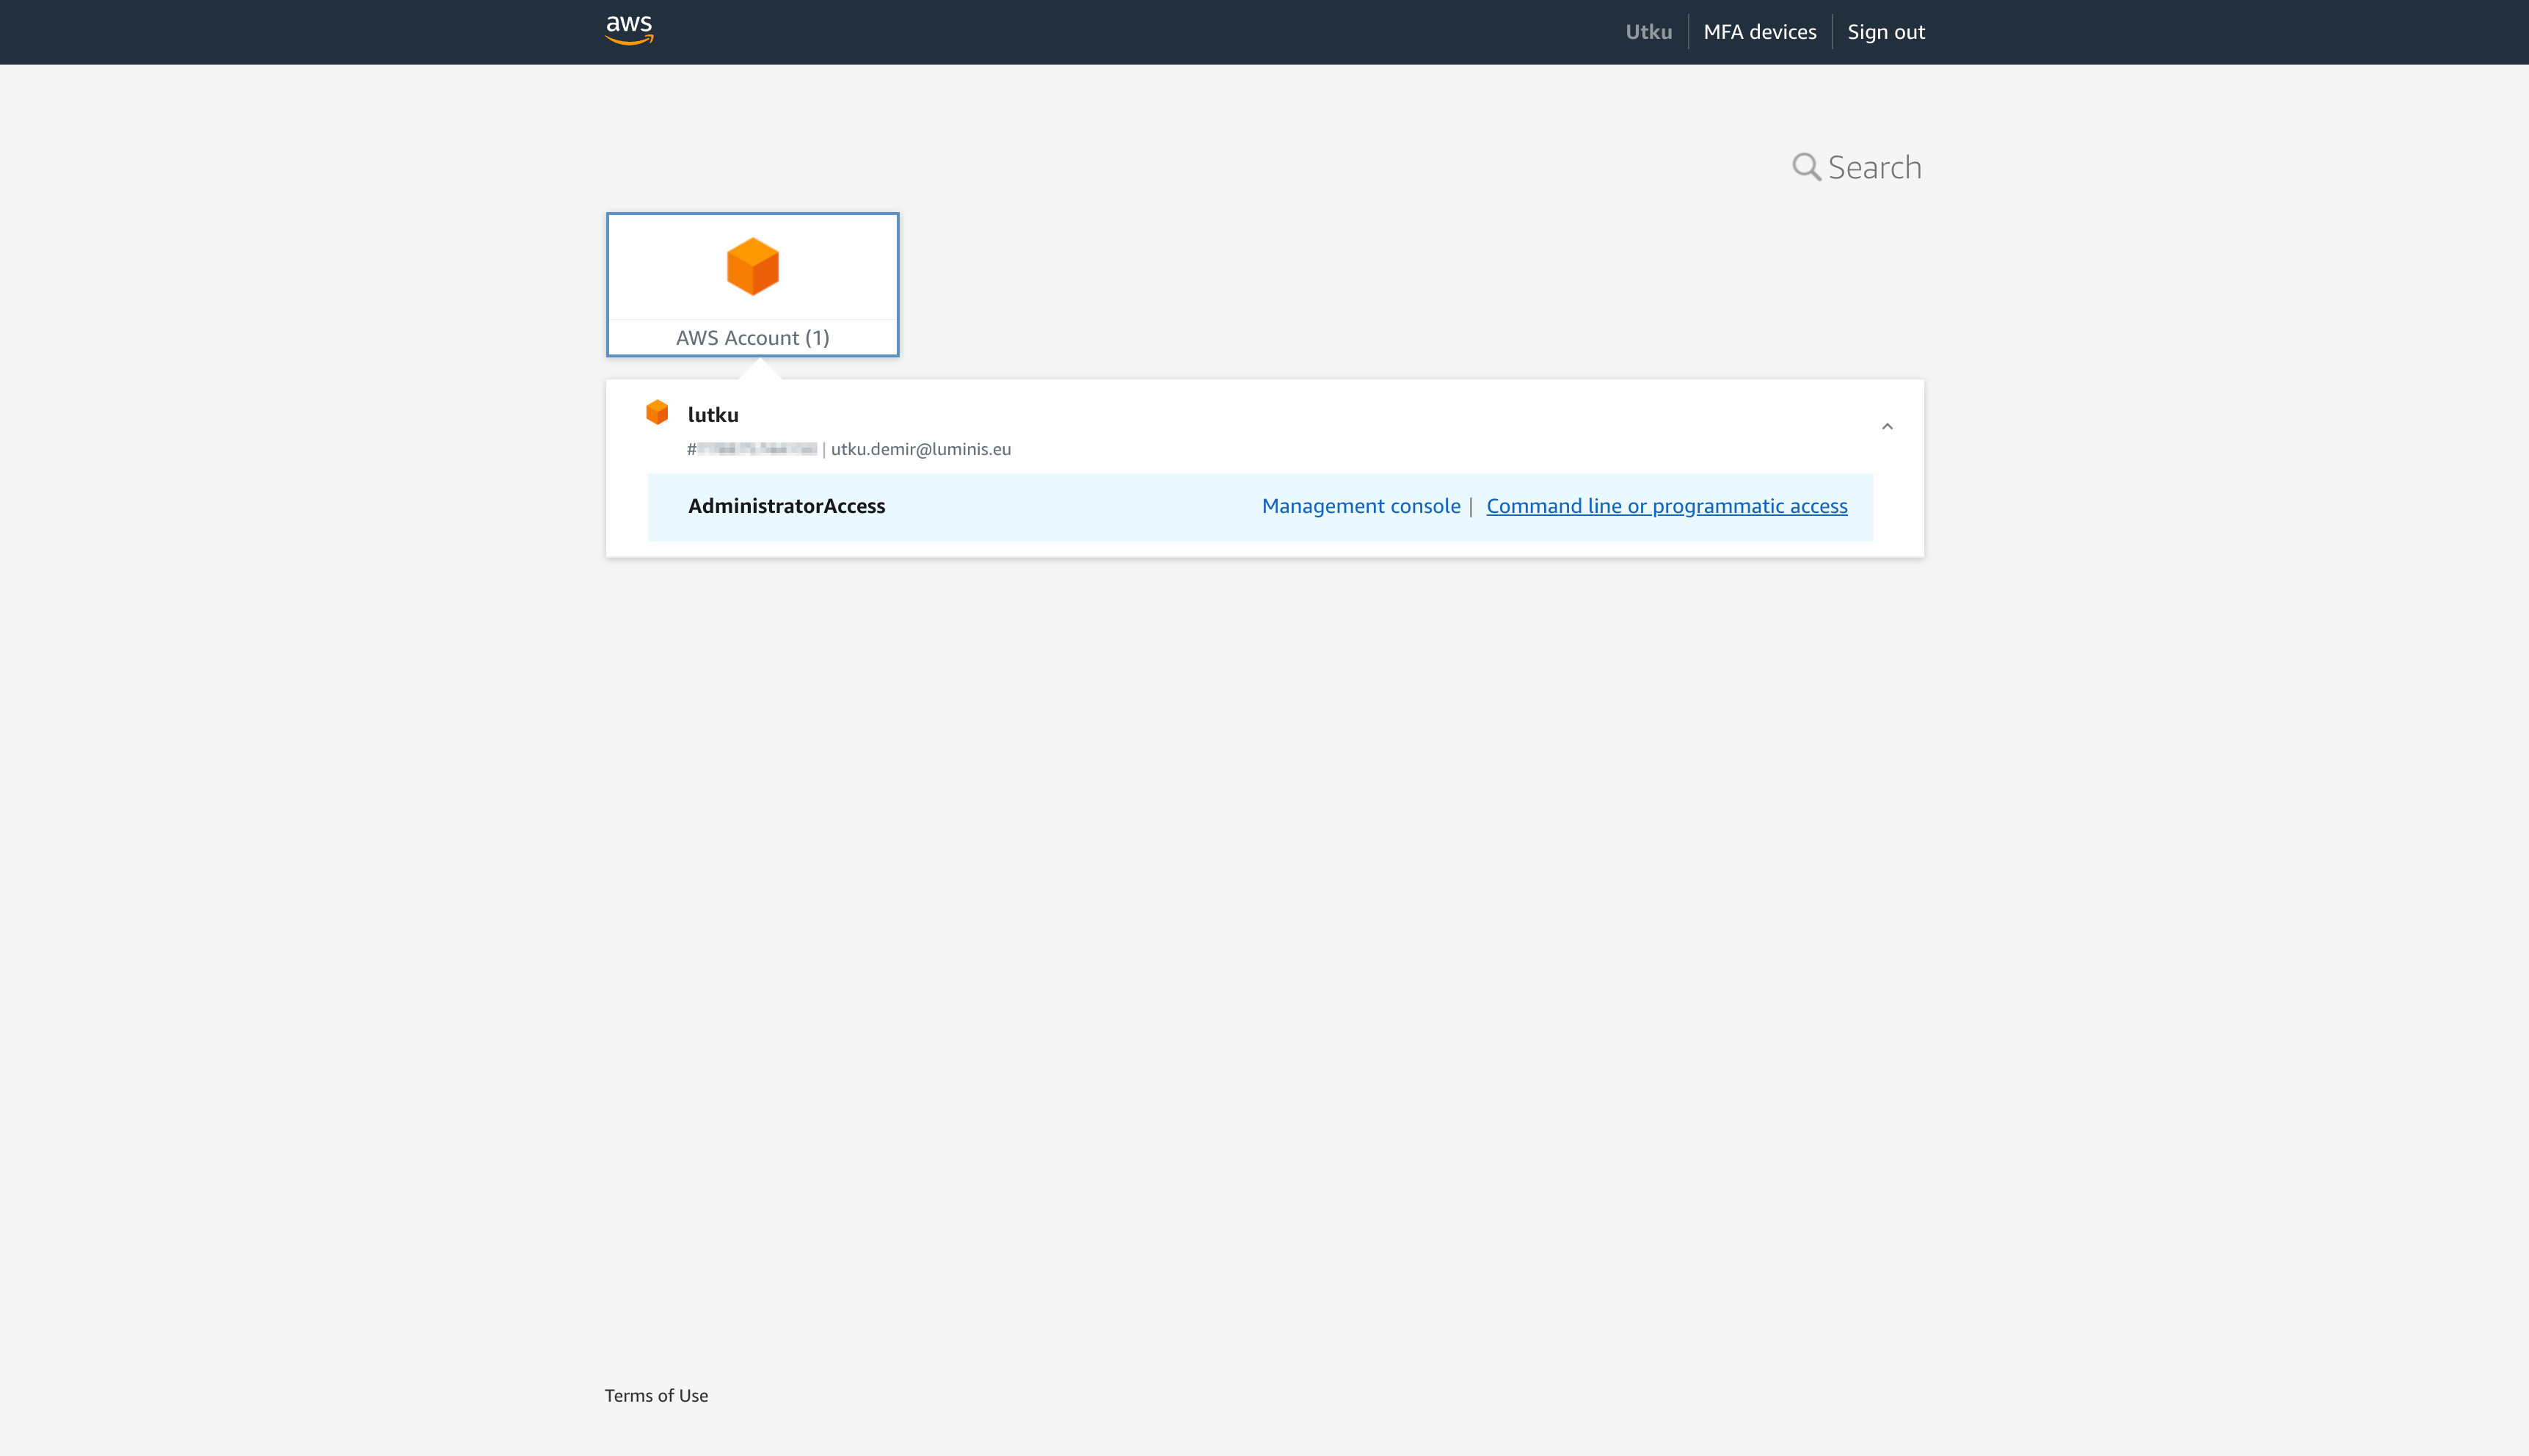
- Following these configurations, you are able to use the AWS Access portal to access your management account. Use your personalized URL, and you should be greeted with a login prompt.

- Login using the credentials and you see the following page:

Step 2: Infrastructure as Code Preparation
For scalability and ease of maintenance of your AWS multi-Account organizational structure, we’ll employ AWS CDK, a favorite among AWS users. It aids in deploying AWS resources using your preferred programming language. To generate our CDK application, we’ll use projen, which helps manage our CDK configuration. My colleague has a comprehensive series that delves deeper into its benefits.
- Initialize a new repository:
mkdir organisational-setup && cd organisational-setup
git init
npx projen new awscdk-app-ts- Update the .projenrc.ts configuration file:
import { awscdk } from 'projen';

const project = new awscdk.AwsCdkTypeScriptApp({
  authorEmail: 'utku.demir@luminis.eu',
  authorName: 'Utku Demir',
  cdkVersion: '2.96.2',
  defaultReleaseBranch: 'main',
  name: 'organisational-setup',
  github: false,
  projenrcTs: true,
  keywords: [
    'AWS CDK',
    'projen',
    'Typescript',
    'Deployment',
  ],
  gitignore: ['.idea'],
  license: 'MIT',
  licensed: true,

  deps: ['@pepperize/cdk-organizations'],
});
project.synth();
It is important to add @pepperize/cdk-organizations to the dependencies as it is the community construct library we will use to generate the AWS Organizations resources.
After updating, generate the project:
yarn projen- Create a new file named
organization_setup_stack.tsunder src to include the necessary configuration for our stack:
import * as orgs from '@pepperize/cdk-organizations';
import { Stack, StackProps } from 'aws-cdk-lib';
import { Construct } from 'constructs';

export interface OrganizationSetupStackProps extends StackProps {
  environments: string[];
}

export class OrganizationSetupStack extends Stack {
  constructor(scope: Construct, id: string, props: OrganizationSetupStackProps) {
    super(scope, id, props);

    const organization = new orgs.Organization(this, 'organization', {
      featureSet: orgs.FeatureSet.ALL,
    });

    const deployment = new orgs.OrganizationalUnit(this, 'deployment', {
      organizationalUnitName: 'Deployment',
      parent: organization.root,
    });

    new orgs.Account(this, 'deployment-account', {
      accountName: 'DeploymentAccount',
      email: 'utku.demir+deployment@luminis.eu',
      roleName: 'OrganizationAccountAccessRole',
      iamUserAccessToBilling: orgs.IamUserAccessToBilling.ALLOW,
      parent: deployment,
    });

    props.environments.forEach(appEnvironment => {
      const environmentOrganizationalUnit = new orgs.OrganizationalUnit(this, appEnvironment, {
        organizationalUnitName: appEnvironment,
        parent: organization.root,
      });

      new orgs.Account(this, `${appEnvironment}-account`, {
        accountName: `${appEnvironment}-account`,
        email: `utku.demir+${appEnvironment}env@luminis.eu`,
        roleName: 'OrganizationAccountAccessRole',
        iamUserAccessToBilling: orgs.IamUserAccessToBilling.DENY,
        parent: environmentOrganizationalUnit,
      });
    });
    organization.enablePolicyType(orgs.PolicyType.SERVICE_CONTROL_POLICY);
  }
}
The above stack, based on the work of Matt Lewis on Setting up a AWS Multi-Account environment, creates organizational units and accounts for application deployment and application hosting environments.
- Edit the main.ts under src to include this stack as:
import { App } from 'aws-cdk-lib';
import { OrganizationSetupStack } from './organization_setup_stack';

const devEnv = {
  account: process.env.CDK_DEFAULT_ACCOUNT,
  region: process.env.CDK_DEFAULT_REGION,
};
const environments = ['dev', 'test', 'prod'];

const app = new App();

new OrganizationSetupStack(app, 'organisational-setup-stack', {
  env: devEnv,
  environments: environments,
});

app.synth();
Here we create three accounts for the three environments for our application: dev, test and prod.
Step 3: Account Bootstrapping and CDK Stack Deployment
As the last step, we will configure our AWS CLI, bootstrap the management account and deploy the stacks.
- Configure AWS CLI for SSO:
aws configure sso- Follow the on-screen prompts to associate your SSO with your company:

- Bootstrap your AWS account to prepare for CDK deployments (don’t forget to replace
123456789012with your own account id):
cdk bootstrap aws://123456789012/eu-west-1 --profile lutku-management- Deploy the stack:
yarn deploy --all --profile lutku-managementCongratulations! Now, you should be able to see the basic organizational structure in place in the AWS Accounts page on IAM Identity Center like:

Conclusion
In this first installment of our three-part series on multi-account GitOps deployment on AWS, we’ve dived deep into setting up an efficient organizational structure. Using AWS’s tools and services, like the AWS Cloud Development Kit (CDK) and IAM Identity Center, we’ve demonstrated how easy it is to set up multiple AWS accounts and create an organizational structure. By the end of this guide, you should have a basic organizational structure in place that paves the way for more advanced GitOps strategies in the subsequent posts. Whether you’re scaling your infrastructure or optimizing access management, the blend of AWS tools and GitOps methodology offers a robust solution. Stay tuned for the next parts, where we’ll delve further into the intricacies of GitOps and multi-account management on AWS.
Remember, as you embark on this journey, resources and references provided here are just a starting point. The cloud landscape is vast and ever-evolving, so always be open to exploration and learning.
Happy Cloud Engineering and until next time!
References:
Meer weten over wat wij doen?
We denken graag met je mee. Stuur ons een bericht.

