How we configure our Azure DevOps build and release pipelines
When you build software for the cloud, you want to release often. This is why you want to configure a good Azure DevOps pipeline.
Azure DevOps provides multiple starter templates for configuring your build and release pipelines, but most of the times those do not completely satisfy your needs. Especially when you need to deploy to a DTAP environment. I will show a fully functional template step-by-step, based on the bare minimal ‘Starter Template’ that Azure DevOps provides. At the end of this blogpost, you will find a link to the sample templates.
The pipeline is stored in git
Previously the build and release pipelines lived in Azure DevOps and were not linked to any version of the software, which gave problems when you needed to build or release an old version of the code. Fortunately this is changed! The pipeline can now be stored in git to enable it to grow with development.
I always create two folders in the root of my repo:
- .azure: in this folder, the ARM template and other files related to it are stored.
- .azuredevops: this folder contains the build and release pipeline.
The pipeline we use to build and release
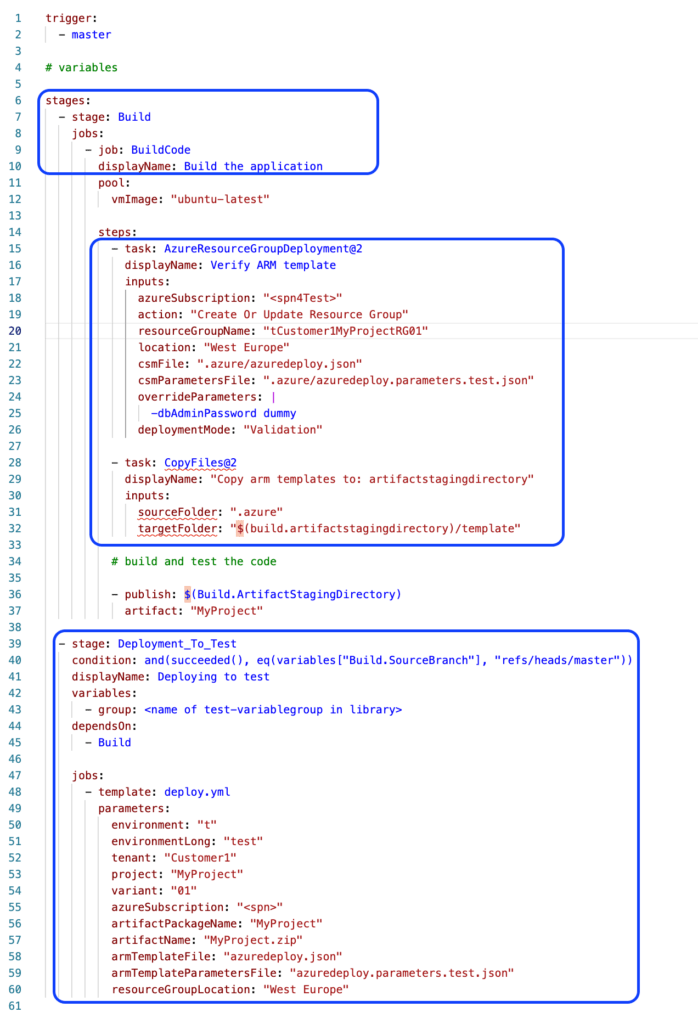
The picture below shows the changes I made to the starter template. Below the picture I describe and explain the changes.
To make the pipeline short and clear, I hardcoded variables and removed the build and test-parts. Normally we use variables to support our naming conventions. But that can be a blogpost on its own.
Step 1: Introduce stages and jobs
In the first block, I wrapped the normal build template in a Build Stage. That allows me to add release stages later on.
Step 2: Add ARM template validation to the build
I don’t want surprises while releasing the Azure, so I validate the ARM template during the build. To validate the ARM template, set the deployment-mode to Validation. When variables need to be passed to the template, you can pass ‘dummy’ values to the override parameters.
After the validation is finished, the template is copied to the artifact staging directory.
One thing to note here is the azure subscription (here: azureSubscription: “<spn4Test>”). This is the name of the service connection as configured in Azure DevOps under Project Settings -> Pipelines -> Service Connections and serves as the credentials used to release to Azure.
Step 3: Add the release stages
We can now add the first deployment stage at the end of the file. As the release stages will only differ in variables, we will introduce a deploy template for the release. I will describe the template next.
The deployment-stage contains the following elements that require some explanation
- condition: only when this condition is true, the deployment is executed. So if the build is triggered by a pull request, the release is not executed since the branch-name does not match ‘master’.
- dependsOn: defines the preceding stage. If the condition states succeeded, that stage should have a success-outcome.
- variables: you can link here a variable group defined in the Azure DevOps library. These variables can be referenced as $(variable-name), either here or in the deploy-template.
Step 4: Add deploy.yml to git
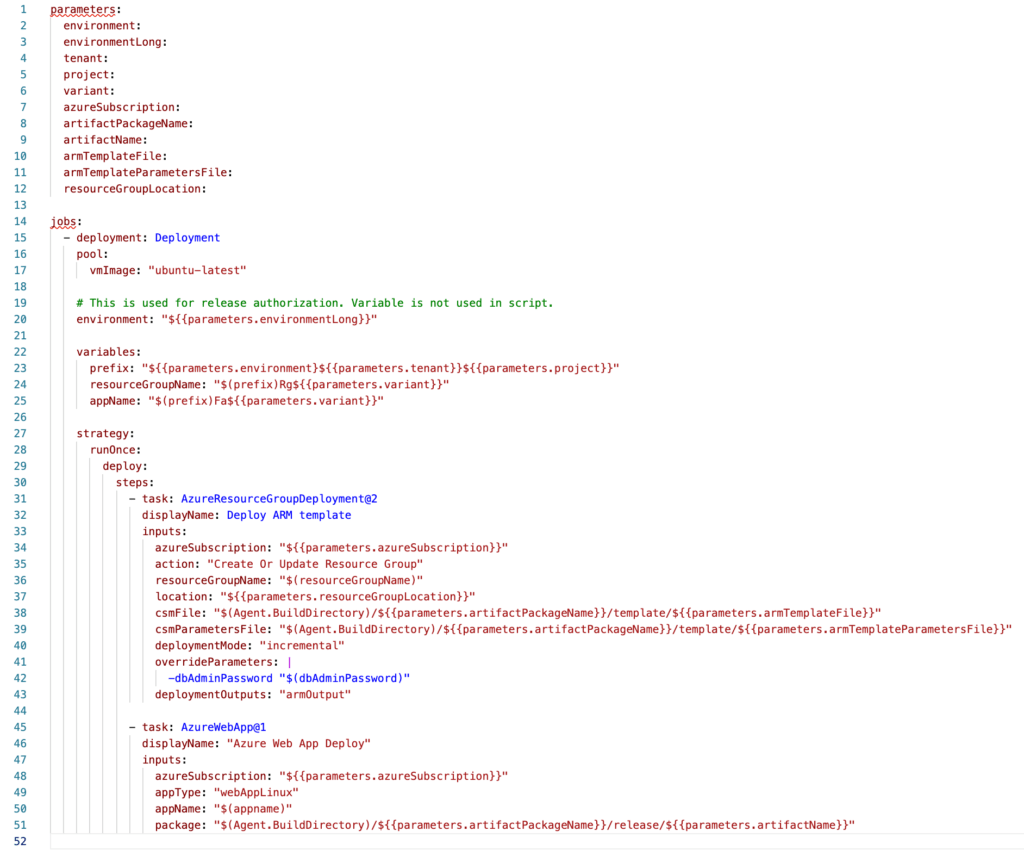
I have provided a very simple deploy.yml, but it can get as complex as you need. I first create, based on the values of the parameters, some variables that I can use later on.
Variables in the pipeline require some special attention:
- Variables defined in azure-pipelines.yml are available here. That can be confusing. Especially when they have the same name as the parameters.
- Don’t mess up with parameters and variables:
- Parameters are referenced with ${{parameters.parameter-name}}
- Variables are referenced as $(variable-name)
When the environment is set in the release stage, you can configure release approval. More details below in step 5.
Step 5: Configure release approvals
When you configure an Azure DevOps build and release pipeline that deploys to a production environment you want to add some gates. To accomplish this, I set the environment in the pipeline (here at line 20: environment: “${{parameters.environmentLong}}”).
After the first run, the environment is created automatically in Azure DevOps.
You can also manually create in Azure DevOps. Go to the Environments tab under Pipelines in Azure DevOps and create a new Environment.
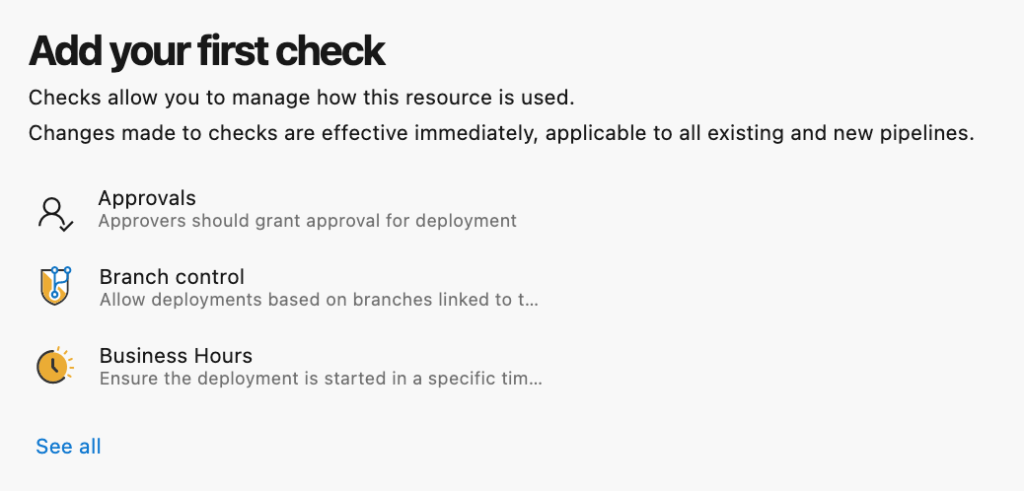
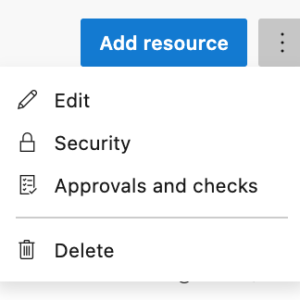
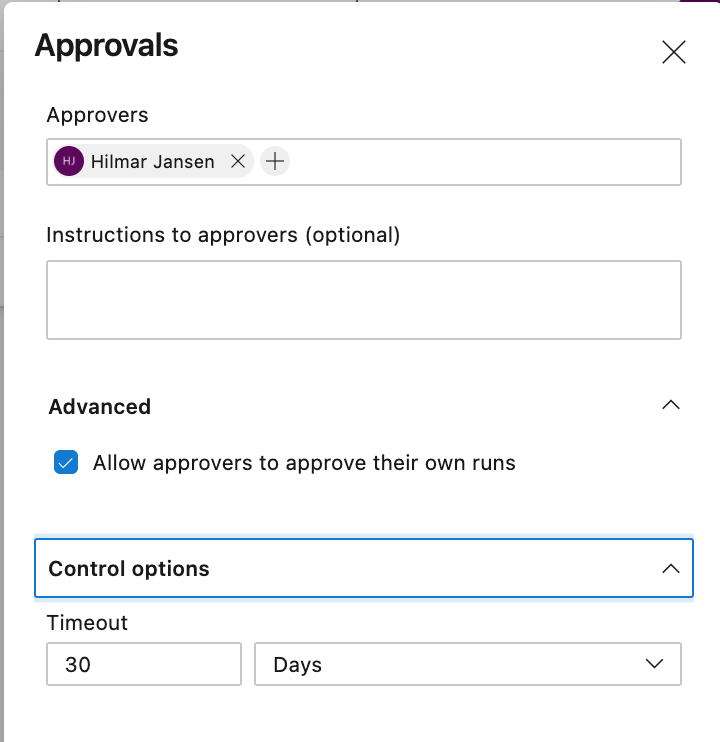
The approvals can be set once the Environment is created. Go to the Environments tab under Pipelines in Azure DevOps, select the environment you just created. Press the dots, select ‘Approvals and checks’ and select ‘Approvals’.
Configure the approval
I have now configured a nice Azure DevOps build and release pipeline that can grow with my development. By storing the pipeline in git, I have full version control on the pipeline and can introduce changes to it at the moment they are needed.
These templates can be found on GitHub.
